Showing posts with label Recipes: Meat Dishes. Show all posts

Monday, March 29, 2010

RECIPE: Slow-Cooked Short Ribs and Blueberry Dump Cake

Yesterday I wanted to make a good meal (since I'm down to really only cooking on the weekends), but I didn't want to spend hours in the kitchen. So I thought, "This is the time for the slow cooker!" I used trusty Google to find a good slow-cooker recipe, as well as a good easy dessert.

First I settled on a recipe for Smoke House Short Ribs from the Food Network.

Smoke House Short RibsRecipe courtesy of Sandra Lee via the Food Network

Ingredients


  • 2 tablespoons olive oil

  • 8 short ribs

  • Salt and freshly ground black pepper

  • 1 large onion, thickly sliced

  • 1 (12-ounce) bag baby carrots

  • 1 cup celery, thickly sliced, about 2 stalks

  • 1 teaspoon minced garlic

  • 2 teaspoons smoked paprika

  • 2 teaspoons smoked ground black pepper

  • 1 1/2 teaspoons all-purpose seasoning salt

  • 1 cup red wine

  • 1 (10.5-ounce) can beef stock

Directions:

  • Heat olive oil in a large saute pan over high heat.
  • Season short ribs with salt and pepper.

  • Sear the short ribs on all sides until brown and caramelized.

  • In the bottom of a 5-quart slow cooker, place the onions, carrots, celery and garlic. Then add the smoked paprika, smoked black pepper and all-purpose seasoning salt. (NOTE: I couldn't find smoked black pepper. So I wound up using regular paprika and black pepper, but adding a little Liquid Smoke for a smoky flavor. I probably only added 1-2 tsp, and couldn't really detect the smokiness. So you could probably start with at least a tablespoon, and possible quite a bit more.)
  • Pour in the wine and beef stock.
  • Place the short ribs, meat side up, on top of the vegetables.

  • Cover and cook on LOW setting for 8 hours. (NOTE: I didn't have that much time, so I actually cooked it on HIGH for about 3 hours.) It will start bubbling, and the meat will brown further.

  • The ribs are ready when they are falling-off-the-bone tender.


Mmmmm good! And you have tons of sauce that you can serve over the meat and veggies. You can try to strain off any fat. Me? I leave it in initially, but remove it from the leftovers that solidify after they cool in the frig overnight. Look at all of the leftovers! And any of the leftovers can be turned into a great beef soup or stew!


For dessert I decided to try a Blueberry Dump Cake recipe, as I had a can of blueberry pie filling sitting in the pantry to use.


Blueberry Dump Cake
from allrecipes.com

Ingredients

  • 1 (18.25 ounce) package yellow cake mix
  • 4 cups fresh blueberries
  • 1/2 cup white sugar
  • 1/2 cup butter, melted
  • 1 teaspoon ground cinnamon

Directions:

  • Preheat oven to 350 degrees F (175 degrees C).
  • Mix berries, sugar, and cinnamon in the bottom of a 9 x 13 inch pan. (NOTE: I was using blueberry pie filling instead of fresh berries. So I just poured the pie filling into a small square pan instead, and omitted the sugar and cinnamon from here.)
  • Cover berries with dry cake mix. Pour butter over cake mix, do not stir. (NOTE: Instead of using melted butter, I used softened butter and mixed it into the cake batter using the food processor. I included the sugar and cinnamon here. I processed until I had a crumbly mixture. I hoped that this would give me a more consistent topping. I also tossed in about a 1/2 cup of chopped walnuts.)

  • Bake for 30 minutes, or until light brown. Serve warm or cold. Top with ice cream or whipped cream.

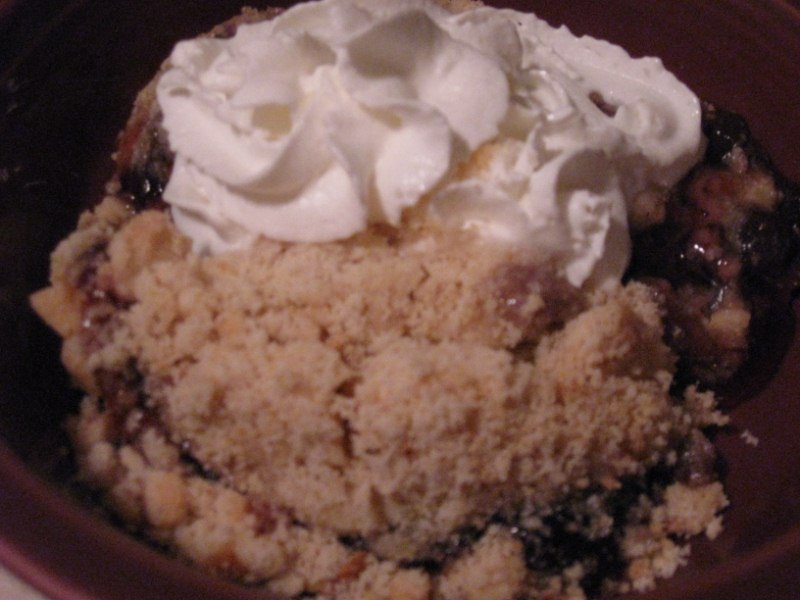

Yum! Woodrow said that this reminded him of when he was a kid and would go to the Pewter Pot for a blueberry muffin served in a bowl topped with ice cream. I prefer whipped cream!

Two very easy dishes that are very tasty!

Thursday, March 25, 2010

Chicken and Pears

The other day I saw a recipe in the Mayo Diet book for chicken and pears, and I decided to make my own variation of this.

I started with some of my homemade basil and sea salt butter, which I melted in a cast iron pan.
I sauteed up a few skinless and boneless chicken breasts (which I had flattened to even thickness with a meat tenderizer). I think that I also sprinkled on a little dried tarragon. Cook the chicken for 2-3 minutes on each side.

Then I sliced up some onion. I only had part of one white onion, so I threw in a red onion as well.

I tossed the onion in the pan with the chicken, and cook until the onions are translucent.

Then I tossed on some sliced pears and lightly covered the pan with foil.


Put the skillet in the oven and bake for about 15 minutes at 375 degrees.

Remove it from the oven, and let the dish rest for about 5 minutes (still covered).

Spoon the onions and pears onto the plate, and top with the chicken. You can top with some sliced raw pears as well. Then sprinkle with a little feta cheese.


Quite good. I liked the cooked pears more than the raw pears. And I loved the saltiness of the feta contrasting with the sweetness of the pears. Very nice! This would have been great paired perhaps with a little couscous or brown rice.

It's a keeper!

Sunday, March 14, 2010

The Daring Kitchen (March 2010): Risotto

Well, this challenge was sort of a fail, in the respect that I failed to accomplish one of the requirements. However the meal itself turned out pretty good. So in that respect it was pretty good!

This month's challenge was risotto. One of the only requirements was that you had to make your own stock. Unfortunately this wasn't possible for me, due to time constraints. And what a shame, since I've had bags of vegetable scraps in my freezer just waiting for me to make some stock.

So I went instead with Mushroom Risotto with Peas courtesy of Giada de Laurentiis, which uses canned stock. However I did have to go searching for a place that sells dried porcini mushrooms, which I finally found at a high-end market down south, at the price of $10/oz.

Ingredients:
  • 8 cups canned low-salt chicken broth
  • 1/2-ounce dried porcini mushrooms
  • 1/4 cup unsalted butter
  • 2 tablespoons olive oil
  • 2 cups finely chopped onions
  • 10 ounces white mushrooms, finely chopped
  • 2 garlic cloves, minced
  • 1 1/2 cups Arborio rice or short-grain white rice
  • 2/3 cup dry white wine
  • 3/4 cup frozen peas, thawed
  • 2/3 cup grated Parmesan
  • Salt and freshly ground black pepper, optional
Direction:

Bring the broth to a simmer in a heavy medium saucepan.

Add the porcini mushrooms. Set aside until the mushrooms are tender, about 5 minutes. Keep the broth warm over very low heat.

Melt the butter in a heavy large saucepan over medium heat. Add olive oil. Add the onions and saute until tender, about 8 minutes.

Add the white mushrooms and garlic.

Using a slotted spoon, transfer the porcini mushrooms to a cutting board. Finely chop the mushrooms and add to the saucepan.

Saute until the mushrooms are tender and the juices evaporate, about 5 minutes.

Stir in the rice and let it toast for a few minutes. Add the wine; cook until the liquid is absorbed, stirring often, about 2 minutes.

Add 1 cup of hot broth; simmer over medium-low heat until the liquid is absorbed, stirring often, about 3 minutes.

Continue to cook until the rice is just tender and the mixture is creamy, adding more broth by cupfuls and stirring often, about 28 minutes (the rice will absorb 6 to 8 cups of broth). Stir in the peas. Mix in the Parmesan. Season with salt and pepper, to taste.

The risotto turned out creamy, and most of it was cooked "just right". Every now and then I would get a grain that was a little underdone (probably the grains that would stick to the spoon or the side of the pan, and therefore absorbed less moisture). I think it could have used a tad more salt though.

While I was in the gourmet market getting the dried porcini, I picked up some edible flowers for the spring salad.


And we finished off the meal with a nice and crusty strip steak!


So the meal turned out pretty good. The flowers were okay. The nasturtiums and dianthus or pinks were fine, but the one fat and curvy pink flower was a little floral tasting.

Good! Too bad that I couldn't meet all of the requirements and make my stock from scratch. So mark this one up as a "pass/fail", because it did both!

Monday, February 15, 2010

The Daring Kitchen (February 2010: Mezze)

(Note: I am late getting this post up. It was due on the 14th, but it has been a busy weekend and I didn't even finish cooking the food until about 10:30 PM on the 14th.)

This month's challenge had a little Middle Eastern flavor. The challenge was a Mezze, which is essentially "appetizers". The only requirement was that you had to make pita bread and hummus from scratch. Other than that, you could add on any veggies or meat that you wished, trying to keep with the theme.

So I decided that in addition to the pita bread and hummus, I was gonna make a little salad and chicken:

Pita Bread

Makes 8 pitas

3 cups flour
1 1/2 teaspoons salt
1 Tablespoon sugar or honey
1 packet yeast (or, if from bulk, 2 teaspoons yeast)
1 1/4 to 1 1/2 cups water, roughly at room temperature
2 tablespoons olive oil, vegetable oil, butter, or shortening


Hummus

1/2 cup canned garbanzo beans, drained
1 tablespoon and 1 teaspoon tahini
1 tablespoon lemon juice
1/4 teaspoon salt
1/2 clove garlic, halved
3/4 teaspoon olive oil
1/4 pinch paprika
1/4 teaspoon minced fresh parsley


Fattoush
(Toasted Bread and Salad)

2 or 3 tomatoes, cubed
1 small cucumber, peeled, quartered lengthwise, and chopped
1 medium green pepper, seeded, deribbed, and diced
5 scallions, chopped
1/2 small lettuce, shredded
2 Tbs. finely chopped parsley
1 Tbs. finely chopped fresh mint or 1 tsp. dried mint
1 pita bread (or 2-3 slices of bread), toasted and cut into cubes
A dressing made from equal amounts of olive oil and lemon juice and seasoned with salt and black pepper. (Make plenty of dressing and store whatever you do not use in the fridge.)


Farareej Mashwi
(Broiled Chicken with Oil, Lemon and Garlic Sauce)

1 small chicken, quartered
Salt and freshly ground black pepper
4 large cloves garlic, peeled and crushed
1/4 cup freshly squeezed lemon juice
3 T. fruity olive oil
1 T. chopped parsley


So first I needed to get my bread rising. I've never really made bread before, and haven't worked with yeast. I mean, I've made beer bread (no yeast involved), and at Christmas I made dog biscuits (which actually may have included yeast). Otherwise I've never made bread.

So the first thing that I did was activate the yeast (I used Active Dry yeast instead of Rapid Rise. That may be one of my problems. I may have not "activated" it properly).

So I added the yeast to warm water, and then a little sugar and let it sit and get foamy and "grow"...

Meanwhile I mixed together the dry ingredients and the olive oil.


Once the yeast was ready, I poured it into the dry ingredients (having reduced the amount of water by the amount added to the yeast), and mixed everything together.


The ingredients began to glom together and make a sticky ball.


The problem was, it seemed too sticky. I couldn't really knead it, as it would stick to my hands and to my butcher block. So I wound up adding flour. And more flour. And more flour. And as I added flour, I thought to myself, "Watch. All this flour will wind up making it too dense and it won't become light and airy and create the air pockets like it's supposed to." But I couldn't work with it when it was as sticky as it was. Perhaps it was a dab more oil that it needed?

So I kneaded it and it formed a ball. I rubbed a little olive oil around in a large bowl, added the dough ball, and rolled it around in the oil to cover it.


Then I covered the bowl with a damp towel and let it sit for about 1 1/2 hours to rise...


While the dough sat, I started on the salad. I chopped all of the veggies, and I minced up the parsley.

I found how great my herb chopper works. Very nice! So I mixed all of that together...


Then I made the dressing of equal parts fresh lemon juice and olive oil...


Then cut up some toasted pita bread and put that on top of the salad (yes, I bought pita bread, even though I was making pita. What can I say. I needed pita for my salad!), and then drizzled all of it with the seasoned dressing. I put that into the frig to sit.

Then I mixed together the lemon, olive oil, chopped parsley and garlic for the chicken marinade in a ziploc bag and added the seasoned chicken to the bag and let it marinate in the frig.

After an hour and a half, it was time to work with the dough again. As I feared, it hadn't risen as much as I expected, but I couldn't wait any longer. It was getting late, and it had already set for 1 1/2 hours. So I cut the dough into 8 pieces and formed dough balls. Man this reminded me of my teenage years working at Little Caesars! It all came right back to me!

The dough balls were left to sit for about 20 minutes with a damp towel over them while the oven heated to 400 degrees.

Once ready, each dough ball was rolled out onto a floured surface and then put on a cookie sheet.


They were baked for about 5-7 minutes, but they just wouldn't brown at all, and wouldn't get crispy. Only a couple of them even puffed to any degree. But I digress.

Then I set the oven to broil, and put the chicken on a broiler pan and broiled it for about 12 minutes or so. I had the oven set to low broil for most of the time, and basted the chicken every 3 minutes with the reserved marinade. Then after about 10 minutes I cranked the heat to high on the broiler and finished off the chicken under high heat.

While the chicken was cooking, I put all of the hummus ingredients into the food processor. The problem is, I couldn't find any tahini at the store. So I did a Google search and found that peanut butter was considered a solid substitute for tahini. This seemed strange to me, given all of the sugar and such added to peanut butter. But I figured if everyone deemed it so, I'd give it a shot. I blended up the hummus, drizzled it with olive oil, and sprinkled over minced parsley and paprika.

When all was said and done, this was the dinner we were left with...


So the verdict...

As I figured, the pita bread came out "doughy". I have to suspect I should have used more oil instead of more flour to resolve the "sticky" issue, but since I've never worked with dough before, I just can't be certain.


The hummus was really visually appealing. However I did not like the substitute of peanut butter for tahini! The smell of peanut butter kept bothering me, and the taste was just "off" from the other flavors of lemon and garlic in the meal.


The salad was really flavorful and colorful. The first bite could make you pucker a little, as the lemon flavor is pretty strong. And the bread was soggy after having marinated so long. But the pita is what had the best flavor in the salad. So I don't know whether I would change the step of marinating the bread in the salad the whole time or not. It's a trade off. soggy bread = flavor!

The chicken was really delicious! Lots of flavor in it! Next time I might cook it under high heat longer, to make it browner. But I wanted to be cautious, as I couldn't find the chicken I wanted with skin on. So I worried about it getting dried out under a broiler.


So that was my middle eastern cooking experience.


The chicken is a definite keeper. I would do the hummus again when I can find tahini for it. The salad is a nice combination with the hummus and the chicken. However I think I probably won't do the pita bread again. Too much effort with too little pay off!

I always enjoy my cooking challenges! They give me an opportunity to try things that I wouldn't try otherwise. Thanks Daring Kitchen!